My Kefir-Making Update & What Inspired Me
Post may contain affiliate links. As an Amazon Associate I earn from qualifying purchases.
About a month ago, I was helping out in the nursery at church. I was talking to a new friend about Trim Healthy Mama and she was telling me about a recent podcast they did on milk kefir. So I went and found the podcast, listened to it, and decided I was going to give making milk kefir a try.
Now I have bought kefir in the store before and have added it to my smoothies, but after listening to the podcast I realized how much better the make-it-yourself version is. So I set off on a new adventure.
I want to encourage you to not be afraid to give this a try. It’s so easy to make and the health benefits are amazing. Even if you have some issues with dairy, you may be able to handle kefir because of what happens during the culturing process! Yeah! Ok, now I will get into the nitty gritty and share links to what I am using to make milk kefir.
Where I Got My Grains
I got my grains from Poseymom on Amazon. She has a website with detailed instructions that you can follow once you get the grains. I was a little unprepared for what they would look like. The grains were in a double bagged bag inside a little box. In the bag was a milky liquid which I assume was some milk to ship it in. But I didn’t really see any grains. If they were there, they were small. But I went ahead and followed the instructions.
I had to let my jar sit on the counter for 24 hours and then I would strain it and put the “grains” or what I thought was the grains, back in the jar and add more milk for another batch. I would say the first 5 days or so there was a curd like stuff that formed on the top but the stuff underneath just looked like milk. I wasn’t sure it was working right. But I didn’t give up. I had read that when grains are shipped, it may take a few days for them to get going again.
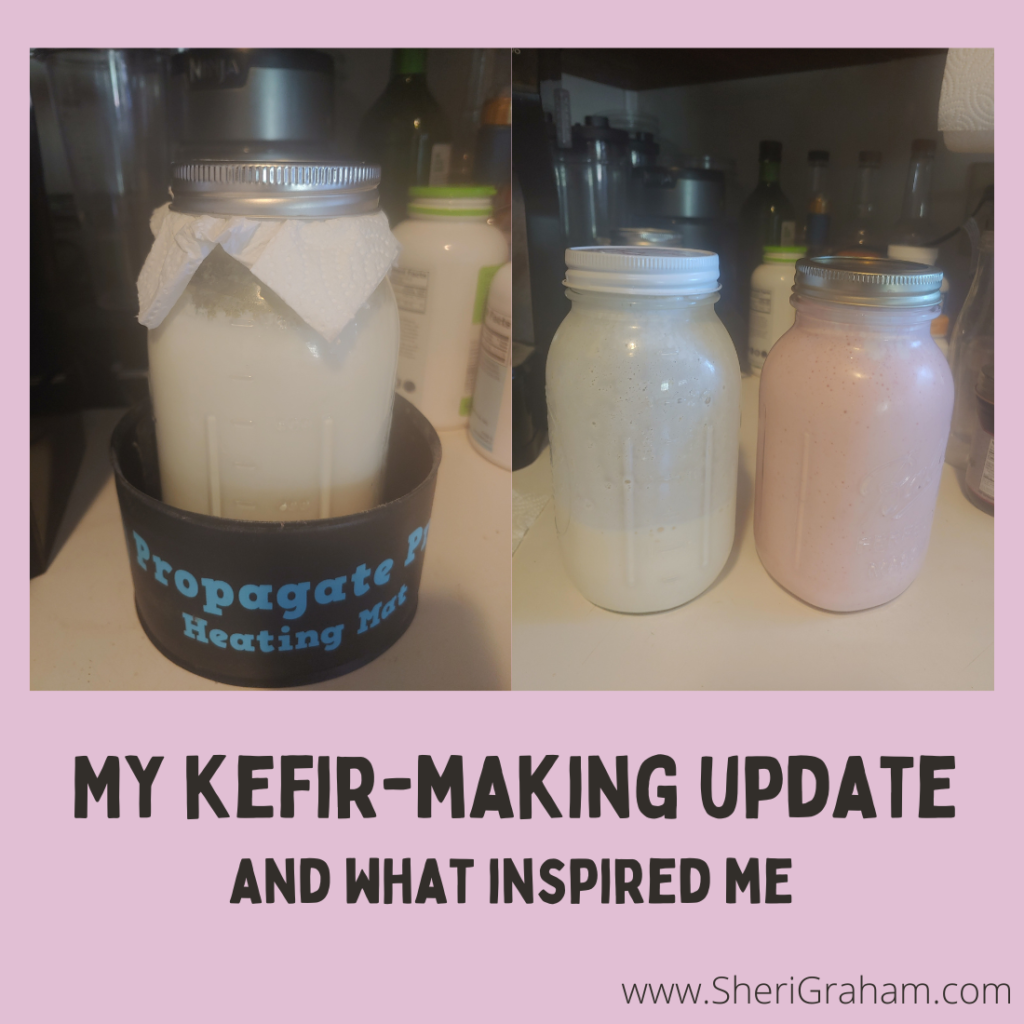
Another thing I did after the first 5 days or so, was to add using a warming mat. Our house isn’t really warm, and I wondered if that would help things.
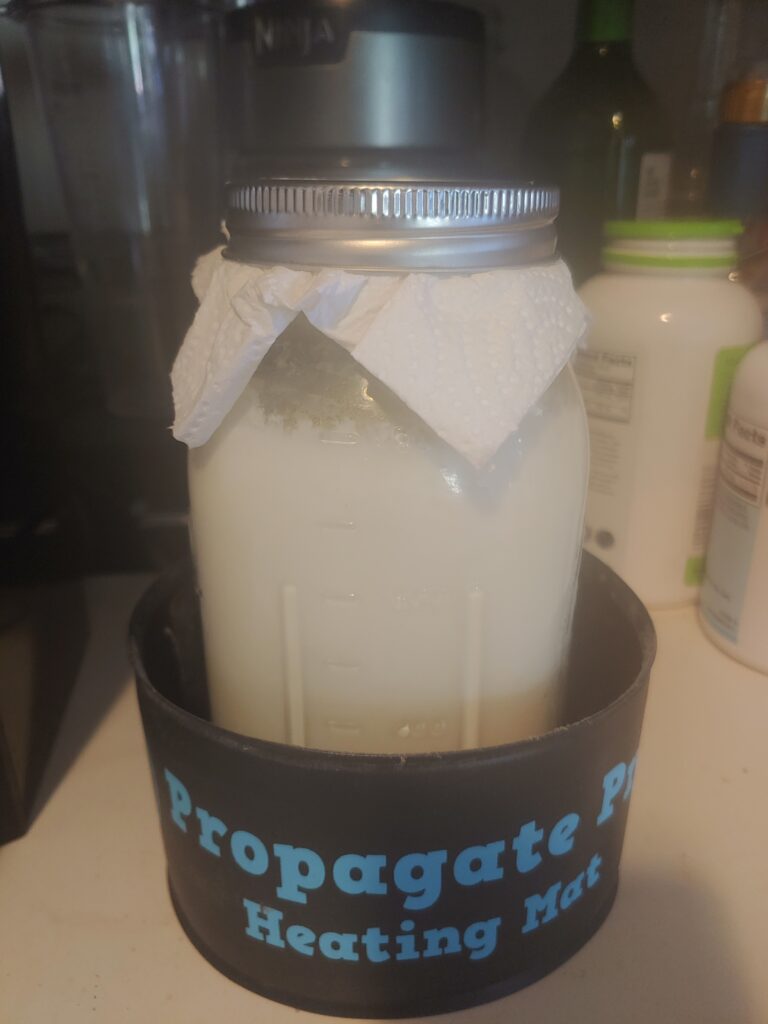
The Warming Mat I Am Using
I actually got these warming mats to use when I was making Kombucha. So I took one of them, rolled it up so it makes a circle that I could set my jar down in. I used a clothes pin to hold it together. I didn’t make it tight against the jar because I didn’t want the jar getting too warm. You can see in the picture above to see what I mean. So far it is working perfectly! My kefir is now culturing (getting somewhat firm and starting to separate from the whey) in about 12 hours. That means that I can make 2 quarts of kefir a day!
What amazes me is how few grains it takes to culture a quart of milk! I can tell that the grains are getting bigger. They are supposed to over time get bigger and multiply. Once I have more than I need, I have two friends who would like some so they can start making kefir too.
What Milk to Use
According to the Trim Healthy Mama sisters, you don’t have to use expensive milk to make milk kefir. It is totally fine to use cheap milk. I prefer to use milk that for sure does not use hormones, but I am using the cheap 2% milk from our local grocery store and it works fine. I guess when the milk cultures, the grains eat up all the stuff in the milk that may not be good for us. Interesting for sure!
The Process – Including Doing a Second Ferment
The process to make kefir is fairly simple:
- Place your kefir grains in a glass quart jar
- Fill jar with milk, leaving about an inch at the top
- Put a paper towel or coffee filter over the top of the jar and keep in place with a ring (this keeps bugs out)
- Place the jar on your counter or put in a warming mat like I did
- Let sit for 12 hours
- It is ready when you see the milk clumping together and the liquid whey starting to separate from the milk.
- Using a clean jar, a funnel, and small strainer, pour your kefir through to strain out the kefir grains. You may have to use a wooden spoon or spatula to move the grains around and force the kefir through.
- Put the strained kefir grains back in the original jar that you just emptied, fill again with milk, cover, and place on counter or in warming mat for another 12 hours to start the process all over again.
- NOW TO SECOND FERMENT the kefir you just strained. Add a handful of fruit to the jar (so far I have done peaches and strawberries), stir, and cover with a lid. Set on counter for a few hours to second ferment. The sugars in the fruit will feed the kefir and allow it to ferment more, exploding the health benefits of the kefir. After 2-3 hours, you should notice the kefir starting to harden up again and maybe separate from the whey again. Not it’s time to put it in the fridge to slow the culturing process.
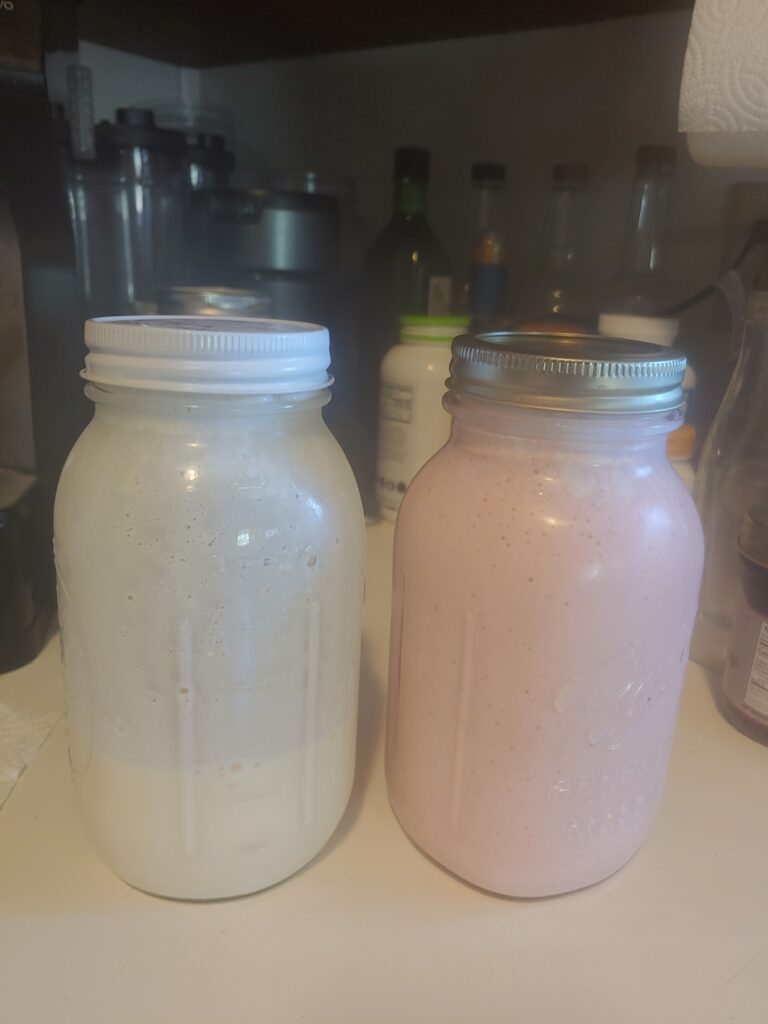
- HOW TO FIX IT TO DRINK – If I have time I will go ahead and after the second ferment get the kefir ready to drink. (If I don’t have time, I will just put the jar in the fridge and do this later.) I dump the jar of kefir in my blender, add some more fruit (again, I have used peaches and strawberries), and some stevia to sweeten. I blend it all up and then pour back into the jar (you’ll probably need more than one jar because adding the fruit and blending makes it more in volume), put a lid on it, and store in the refrigerator. It is ready to drink! In the picture above, you can see my two jars – one with peach and one with strawberry kefir. That is what it looks like when it is ready to drink. It is a little thick (kind of like buttermilk but not as thick), and creamy and oh so good!
* You can use fresh or frozen fruit when doing the second ferment.
Besides just drinking kefir by the glass, you can add it to smoothies as well. There are lots of recipes online for things you can make with kefir — from dips, to salad dressings, to using it when making pancakes. So far for us, we are just drinking it straight and putting it in smoothies. It tastes SO good!
The Benefits of Kefir
You can find lots of information online about the benefits of kefir, but I thought this article did a good job of covering some of the basics.
From our own experience so far, after just drinking kefir now for about a week, we have noticed some interesting health benefits. I was excited for my kids to start drinking kefir, especially my son who was diagnosed with Crohn’s about four years ago and has pretty much healed from that. But I was curious if he would be able to drink it and how it would make him feel. He said that when he drinks it it makes him feel good. He said that he feels more calm and less anxious. He said in the past when he got anxious, his heart would race, and not he has noticed that it doesn’t do that much any more.
It may be just coincidence, but maybe not the more I read about the benefits of kefir. I read that it is great for getting rid of Candida, which a lot of people have and don’t realize it. It is just so good for your gut health and I am excited to see what other benefits we notice in the days ahead.
How about you? Will you give kefir a try? I’d love to know if you make kefir and if so, what health benefits have you experienced?


2 Comments