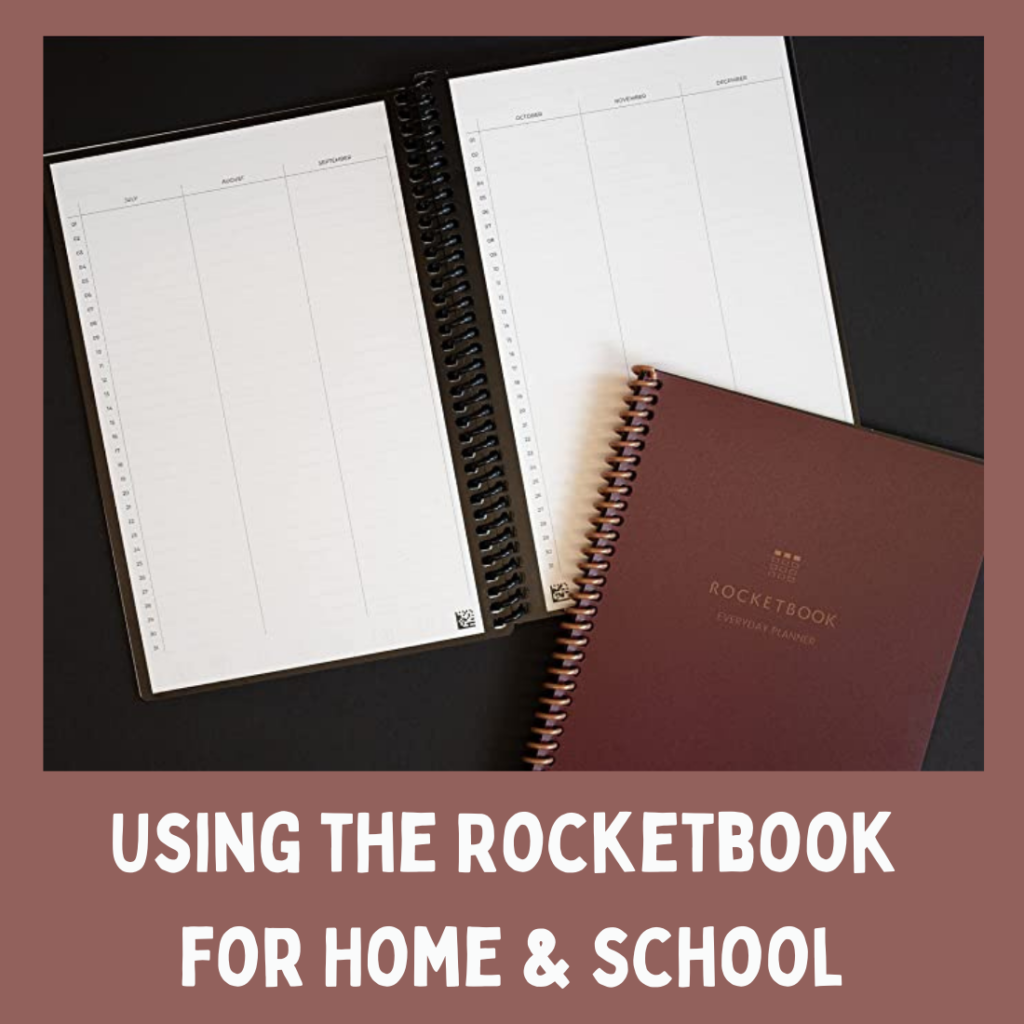
Using the Rocketbook for Home & School (My Rocketbook Review)
Post may contain affiliate links. As an Amazon Associate I earn from qualifying purchases.
It was quite a few years ago that I remember hearing about the Rocketbook product. It was a brand new product that was using crowdfunding to get their product funded and started. The original product was a notebook that you had to use a special pen to write in. Once you were done writing in the notebook and scanning the pages, then to “erase” the pages you put the whole notebook in the microwave.
At the time I thought the concept was interesting, but not something that I thought was very practical for me to use. What if I just wanted to erase one page? Also the fact that it took a special pen was a downer for me. So I did not jump in at the time to support the crowdfunding and totally forgot about it.
Then recently I was on a zoom call with another blogger and she was talking about her reMarkable tablet where she could write on it and it would convert it to text or files and save to specific places like Google Drive, Dropbox, etc. It sounded interesting so I looked it up online. Once I saw the pricetag ($600+), I knew it was beyond my budget!
Whenever I research something like this, I like to go to Youtube and view any reviews or tutorials to learn about the product. As I was scrolling through videos on reMarkable, I found one that had a comparison of reMarkable vs. Rocketbook. I was intrigued. So I started researching Rocketbook, finding out what it was, what the options were, how much it was, etc. I found out that it was much cheaper ($30 range). I liked what I saw in the tutorials, so I decided to give it a try. Boy am I glad I did! I absolutely LOVE my Rocketbook planner and am excited to share all about it.
Before I get started talking about how you can use the Rocketbook, watch this short video briefly explaining what the Rocketbook is and how it works.
Isn’t that cool? Now that you kind of understand how it works, let’s dig into how you can use it!
Using the Rocketbook for Home Planning
I am just getting started really using the Rocketbook, but have already found so many uses for it!
- Weekly schedule
- To do lists
- Sermon notes
- Journal
- Gratitude journal
- Bible study notes
- Exercise or food journal
- Grocery lists
- Track habits
- Book lists
- Anything I want to write down!
Here is a short video from Rocketbook showing the Everyday Planner that I have.
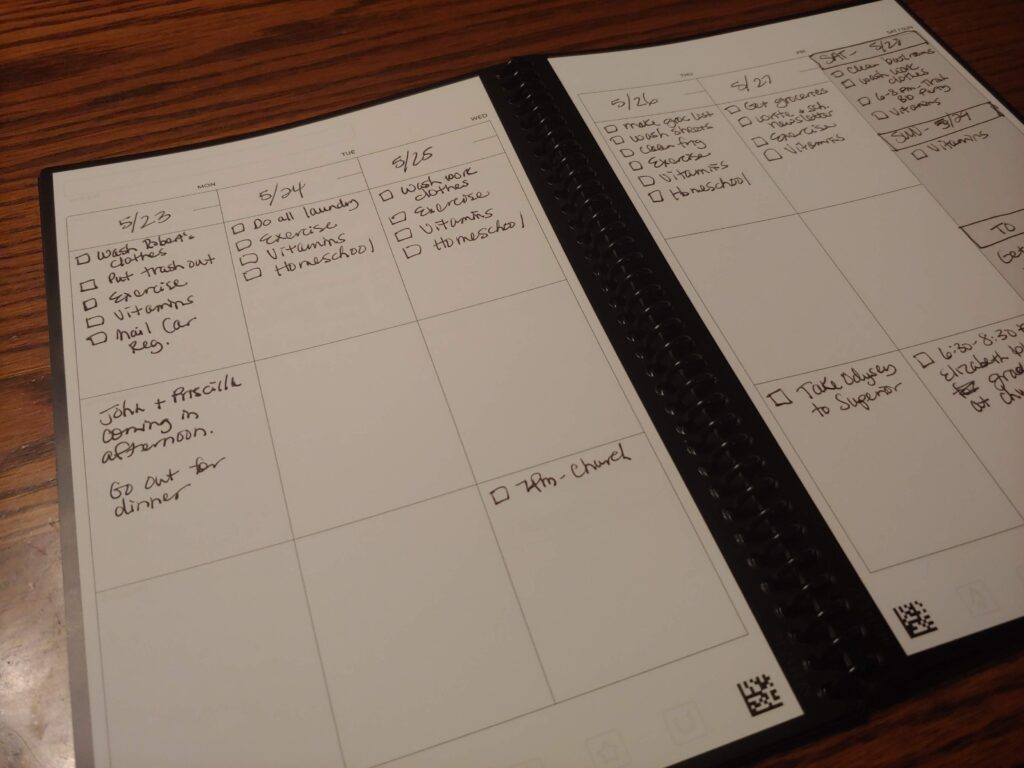
This is the weekly spread where I write out my to do lists for each day and any appointments that I have. The Everyday Planner has 3 weeks worth of pages so that way I can have the previous week’s pages as I plan for the next week to make sure that I carry over any items I did not get done. Once I get my new week written out on clean pages, I wipe clean the old pages so they are ready for another week.
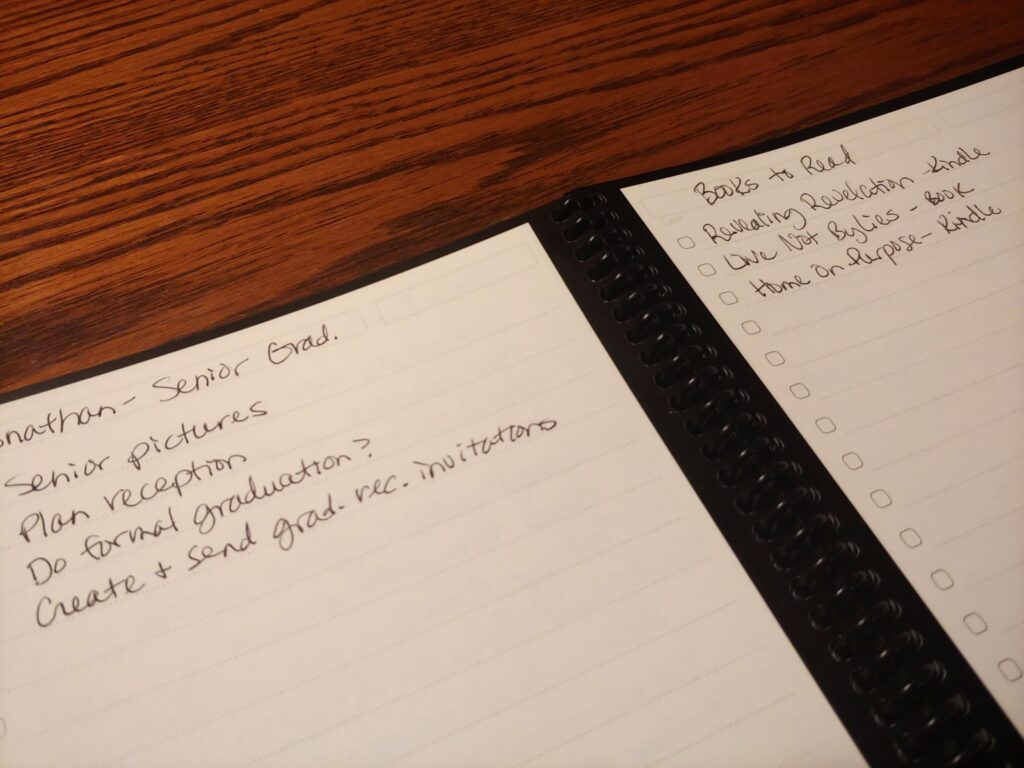
This is a sampling of the list pages. I have a lot of different things I am making to do lists for. I love having them all in one place!
Related Post: Why Keeping a To Do List is So Important + How To Get Started
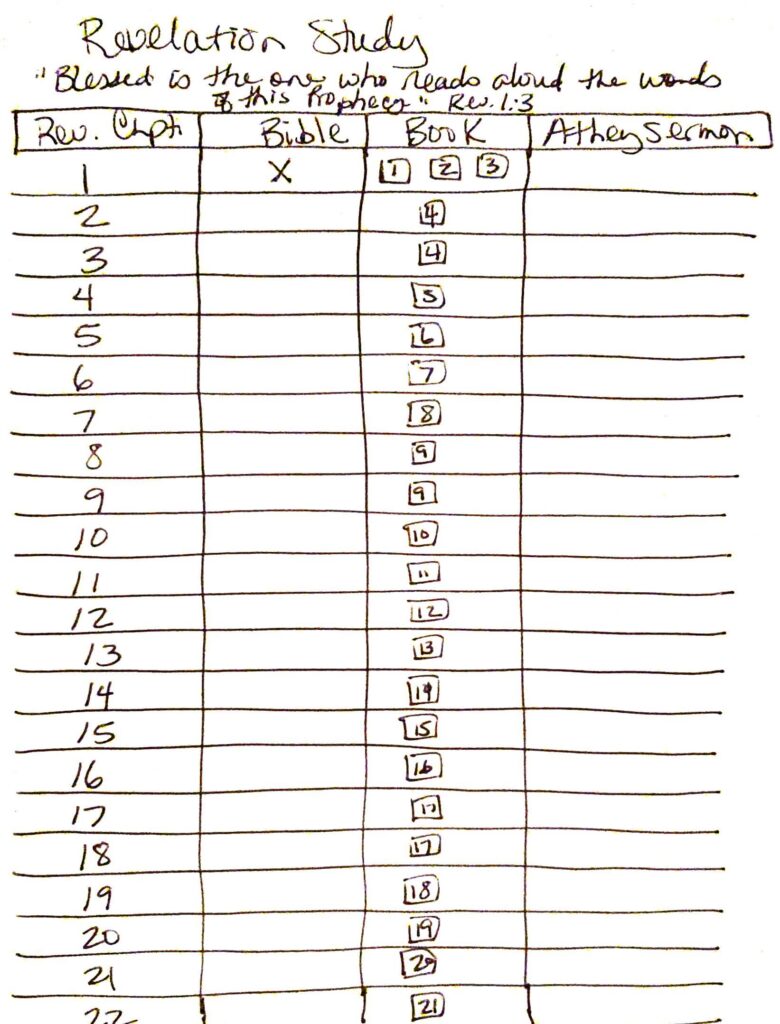
I created this chart to use for my Revelation study! This way I can check off as I complete each item.
Using the Rocketbook for Homeschool
Since we are at the end of our homeschool year, I haven’t had a lot of time to really consider how I want to use the Rocketbook for our homeschool. But here are some ideas that I thought of:
- Homeschool schedule
- Writing assignments
- Spelling practice
- Gratitude journal
- Journal
- Class notes
- Projects
- To do lists
- Sermon notes
- Track habits
- Penmanship practice
- Book lists
Since we are talking homeschooling, the Academic Planner may be another good option if you want a little more focus on homeschool planning or just want a planner that is dedicated to homeschool. This short video gives a walkthrough of this planner so you can see what it looks like.
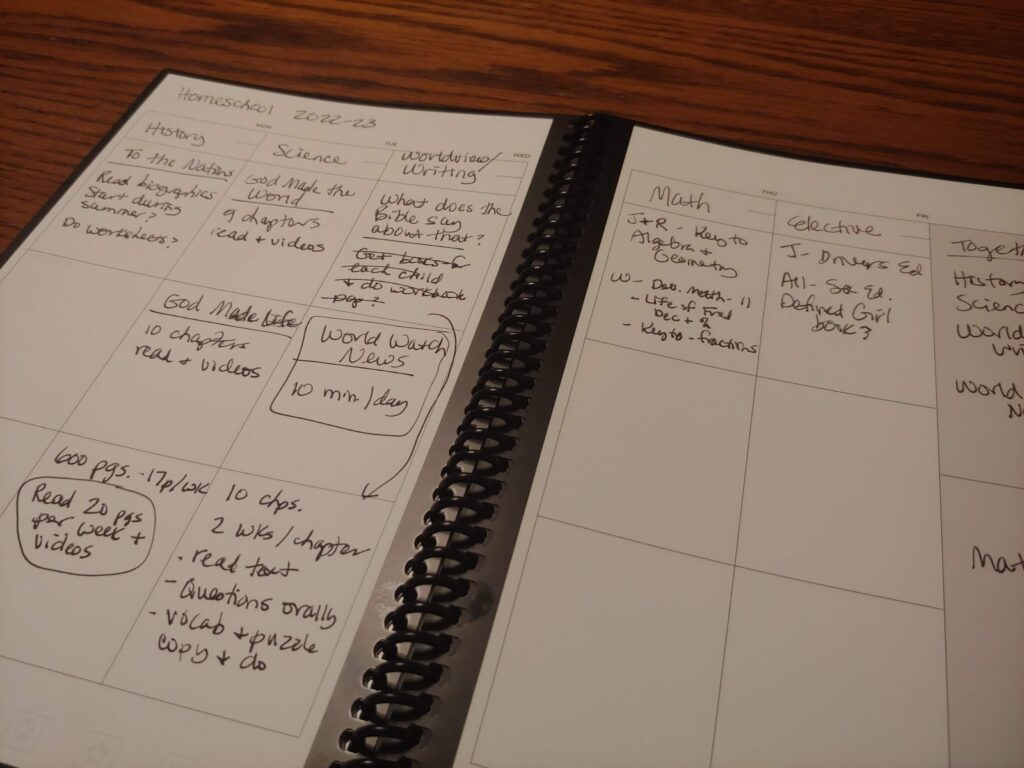
I used one of the weekly spreads in the Everyday Planner to plot out some homeschool curriculum notes for next year. I put the subjects at the top and then used the boxes below each to write out what I am considering using and some more specifics about how I will implement it into our homeschool schedule. See how versatile this can be? You can use the pages as intended or come up with other ways to use them. Love it!
Related Post: How to Set Up Your Homeschool Schedule (4-Part Series)
If you like to keep more of a journal of your homeschool days (writing out at the end of the day all that you and the kids did that day), then the Rocketbook would be amazing for that! You could use any of the formatted pages or just the lined pages, put the date at the top in the title box (then when you scan and save the file it will pick up the date as the file name), and write out what was accomplished that day.
Then maybe once a week you can scan and save all the pages and they will be saved with the date as the file names in the specific location you chose. I would set up a folder in Dropbox or Google Drive labeled for that homeschool year and save all the files there. Once that is done and you have checked to make sure they saved correctly, then you can erase the pages and you are ready for another week.
What I Love About the Rocketbook
If you can’t tell, I am really enjoying using the Rocketbook. Below I want to go into a bit more detail about the different aspects that I love to give you a more rounded picture of the amazing features of this product.
I can write without worrying about it being in the right place, or writing it somewhere that I will forget where I wrote it. I love writing and I love notebooks. But my problem is that when I want to write something down, it is a pain to figure out where to write it so I can find it again. I don’t want to write it in my planner because then it will mess up my pages. I don’t want to write it down on a piece of paper because I might misplace it. With my Rocketbook, I can just find a blank page and write it down, knowing that I can save it to a folder in Dropbox that will help me find it again when I need it, AND I don’t have to worry about messing up my pages in my planner because I can simply erase it once I am done saving it.
I can use and re-use the planning pages. I have always loved having a planner of some kind that I write out my weekly schedule and to do lists in. I love having before me each day what I need to accomplish, then checking things off as I get them done. So I love that I can use and re-use the weekly planner pages over and over. I don’t even worry about scanning and saving them like I do other pages in my planner. It’s nice knowing that I can always have a clean slate to write on again and again.
I can save the pages as images, PDF files, or text. The above is an image file created from one of my sermon notes pages. I have the settings set so that my Sermon Notes save as a PDF file to a Sermon Notes folder in Dropbox.
Easily set up destinations to save to. When you are setting up the “destinations” in the Rocketbook app, you can specify what file type you want it to save as. So if you want a PDF file for certain types of pages you can do that, or if you want the pages to save as image files you can do that. Once you have it set up, then every time you save to each destination, it will save it as the file type you specified. Easy!
I set up Dropbox folders to save to, then every so often I will download and save the files to my hard drive. I created one place where all my Rocketbook files will be saved on my hard drive, then I created subfolders for each of the topics. This makes it easy to download from Dropbox and save to the folders I want. I then delete the files from Dropbox. I don’t like having content “in the cloud” that is not backed up on my own personal computer. So Dropbox is just the go-between to store my content until I download it to my computer to save permanently.
You can use a Sharpie pen to make permanent templates to use over and over. I have not done this yet because I am still figuring out how I want to use the Rocketbook. But if you have certain types of pages that you use a lot, and you do some more customizing on the page (adding lines, titles, boxes, text, etc.) that stay the same all the time, you can use a Sharpie black pen to permanently make your own templates. I heard someone suggest that once you are done using the Sharpie pen to customize your page(s), to leave the planner open and let it dry and set really well for a couple days. Then test a small area with water to make sure it is set. If it looks good, then you are ready to start writing with your Pilot Frixion pens in the planner page templates you made. Now when you “erase” the pages, the new template will remain and you won’t have to recreate it each time. Tip: I would suggest that you use the planner for a while first and learn what types of pages you use a lot and on what pages making a more permanent template would be helpful. Once you mark pages up with a Sharpie, it will be hard to erase that if you change your mind!
Use the Rocketbook phone app to scan pages and save. You will probably not want or need to save every page in your Rocketbook planner, but the Rocketbook app makes it so easy to quickly scan and save any page you wish.
Use the Rocketbook app to search your scanned pages! In the Rocketbook app, you can search for words and it will find those words if they were used in the title or content of your scanned pages. This may come in handy if you are looking for something and want a quick and easy way to look for it on your phone.
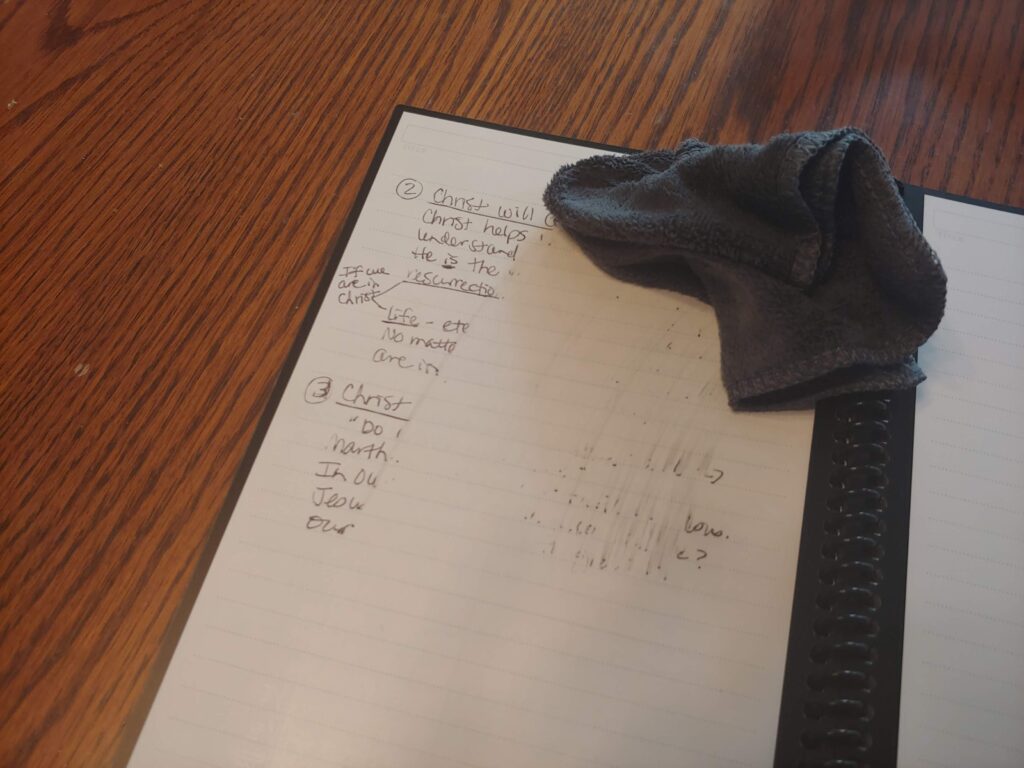
Easily erase used and scanned pages with a damp rag. When you are done with a page, you can either use a damp cloth or a small spray bottle to wet the page and then wipe it clean. Each Rocketbook comes with a small microfiber cloth to use. Once you have wiped the page clean, use a dry cloth or napkin to dry.
Uses Pilot Frixion pens that can be bought online or at major office stores. The original Rocketbook used a special pen that you couldn’t just buy in stores. I love that the new Rocketbook line uses the Pilot Firxion pens that you can buy in any major store. I only have black right now, but you can buy these pens in different colors. The only thing I am not sure about is how well the colors scan, so if you want to use color that is something you will want to test out beforehand.
The cover is sturdy so I can stick the Rocketbook in my purse and take it with me. I love that the cover is a very sturdy plastic so that it makes it easier to write in even if it is not sitting on a flat surface.
There are many styles and sizes to choose from! While I have the Everyday Planner, there are many different styles and sizes to choose from at the Amazon Rocketbook store! I have the Executive size of the Everyday Planner, but they have this planner in the larger letter size as well (8.5×11-inch). I would suggest going and looking through the different options that are available and then deciding on which one would best fit your needs.
One Word of Warning
The only thing that I have found so far that I need to warn you about is that if the planner is left in a hot car or somewhere that gets above 140 degrees F, then the ink may disappear on the pages. I heard that if this happens, it is possible that you could get the ink to reappear by putting the whole planner in the freezer for a while. I have not tested this nor do I want to, but it is important that you keep this in mind when taking it out and about with you.
2 Comments